WH Super Decathlon #2
I’ve owned a set of Wendell Hostetler’s 30% Super Decathlon drawings for probably over 10 years now and just haven’t had the time to build one for myself. I actually built one of these for a customer back in 2008 (build pictures can be seen under 2008 Projects at the left) but it was only built to a point where the customer was comfortable finishing it. The kit that it was built from was a somewhat botched hand cut kit from a cutter out of New Jersey that had to be re-worked extensively. During that process I had made several changes to the design that will be incorporated into the laser cut short kit that we plan to offer. These changes in no way infer that the Hostetler design is flawed and were purely cosmetic or personal preference in nature.
Please be patient as we work out the details and permissions required that will allow us to offer a line of quality laser cut short kits. In the meantime, follow along with the test build of the Wendell Hostetler 30% Super Decathlon which will showcase the quality that we intend to be a part of any kit that we offer…
WHDecathlon2-001
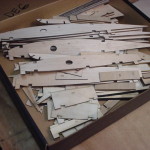
A box of laser cut parts for the Decathlon...many, many parts.
WHDecathlon2-002
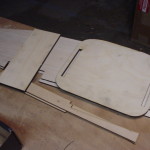
Some of the larger laser cut parts including the 3/8" aircraft ply firewall and the 1/4" balsa fuse doublers.
WHDecathlon2-003
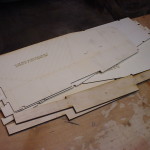
The main fuselage sides cut from 1/8" lite ply and the 3/8" aircraft ply wing joiners.
WHDecathlon2-004
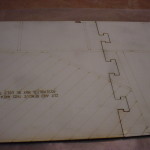
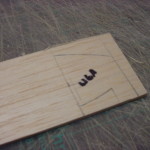
The laser also gives us the ability to "engrave" part numbers and helpful directions right on the parts.
WHDecathlon2-005
The accuracy of a laser cutter just cant be matched!
WHDecathlon2-006
Here we go! 1/4" balsa doublers glued to the 1/8" lite ply main fuselage sides with a thin smear of 30 min. epoxy.
WHDecathlon2-007
Preparing the fuse sides with the vertical components of the formers.
WHDecathlon2-008
Preparing the former tops for installation later.
WHDecathlon2-009
Cutting matched pairs of former cross pieces ahead of time will save time later and ensure a square fuselage.
WHDecathlon2-010
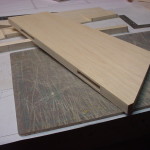
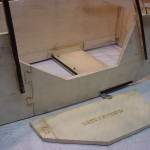
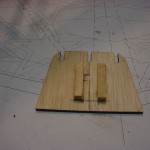
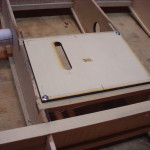
One of the modifications to the original design was the addition of tabs and slots to the fuse/fin mounting plate. This addition makes aligning the rear of the fuselage a snap.
WHDecathlon2-011
Bringing the sides together over the fuselage top view plan.
WHDecathlon2-012
Laying out for the fin mounting rails. Future kits will have these marked out by the laser.
WHDecathlon2-013
Fin mounting rails in place.
WHDecathlon2-014
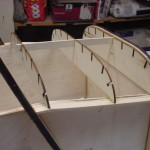
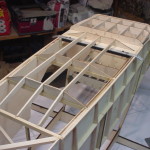
Squaring things up with the former cross pieces in place.
WHDecathlon2-015
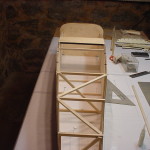
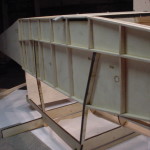
The design does not require the diagonal bracing but I add some as a personal preference, These will ensure that the fuse maintains its shape until formers and sheeting are added later. Some of the bracing is temporary and will be removed after sheeting.
WHDecathlon2-016
A few more temp braces to help keep the correct curvature of the forward fuselage.
WHDecathlon2-017
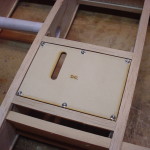
Front end pulled together and held in place by the interlocking firewall. The landing gear mounting plate is also epoxied in place at this time,
WHDecathlon2-018
Tailwheel mounting plate epoxied in place.
WHDecathlon2-019
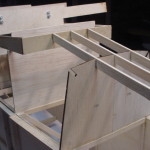
You can see why the fin mounting rails were put in place earlier...much harder to access at this point.
WHDecathlon2-020
Not required by design but i like to add some triangle stock to high stress areas. There is also some behind the firewall.
WHDecathlon2-021
Moving on to the tail feathers...the elevators are started by cutting the skins to shape. Cut all four, pin together, and sand the edges to be identical.
WHDecathlon2-022
Hard to see here but the trailing edges are tapered with a sanding block to 1 3/4". Leave approx. 1/16" of material on the edge. If you do this step ahead of time, be sure to bevel each piece correctly to end up with a right and left top and bottom skin.
WHDecathlon2-023
The elevator ribs were cut from scrap 1/8" sheeting. These parts will be laser cut on future kits.
WHDecathlon2-024
Balsa blocking added for hinges and control horns.
WHDecathlon2-025
One elevator half completed and ready to join to the leading edge.
WHDecathlon2-026
Make sure the elevator centerline is vertical and glue it to the leading edge.
WHDecathlon2-027
Second half glued on. I will cut the halves apart after the hinging is complete.
WHDecathlon2-028
Horizontal stabilizer construction is pretty straightforward and all stick material except for the laser cut center piece.
WHDecathlon2-029
Use a straightedge to ensure the sub leading and trailing edges remain straight.
WHDecathlon2-030
1/4" square balsa for the diagonal bracing.
WHDecathlon2-031
Sheet one side of the stab before removing it from the plan.
WHDecathlon2-032
1/4"x1/2" balsa blocking added at the hinge locations.
WHDecathlon2-033
Sheet the remaining side and add the 1/4"x1/2" basswood trailing edge.
WHDecathlon2-034
1/2" square balsa leading edge will be shaped later.
WHDecathlon2-035
The elevator tips are made by laminating two 1/4" laser cut parts together. This is another departure from the original design which was built up from ribs and sheeting.
WHDecathlon2-036
Elevator tip sanded to shape. You can see a small dip in the sheeting that is outlined in pencil. This will be filled and sanded later.
WHDecathlon2-037
Vertical stab is built using the same processes as the horizontal.
WHDecathlon2-038
Framework completed and ready for sheeting.
WHDecathlon2-039
One side sheeted. I have added 1/4" square blocking at the edges of the sheeting cutouts...not required but my preference.
WHDecathlon2-040
Don't forget the hinge blocks! I almost did on this one.
WHDecathlon2-041
Sheeting completed, basswood trailing edge added, and balsa leading edge added.
WHDecathlon2-042
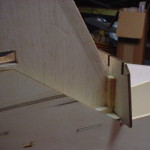
Here is the fin nestled down between the mounting rails added earlier.
WHDecathlon2-043
The main cabin supports have to be routed out to accept the 1/8" steel wire. This is easily accomplished with a rotary tool.
WHDecathlon2-044
Another view of the routing.
WHDecathlon2-045
Marking for the angled cuts on F16 and F17. Lay these parts out carefully as they will determine the wing alignment.
WHDecathlon2-046
All 4 rails in place one last time to check alignment. There are laser marked lines on the fuse sides that mark their position.
WHDecathlon2-047
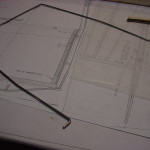
Getting ready to bend the cabin wires using F2 and F3 as a reference.
WHDecathlon2-048
DO NOT bend the wires exactly as they appear on F2 and F3 since they are angled back. You must use the fuselage side view to determine the true length of the upper legs.
WHDecathlon2-049
Test fitting once again but with the wires in place.
WHDecathlon2-050
Checking the fit of the wire against F13.
WHDecathlon2-051
For added security, I bent the ends of the wires 90 deg. so they could be drilled through F16 and F17.
WHDecathlon2-052
Here you can see the wire sticking through a 1/8" hole drilled in the cabin supports. The excess will be cut off flush.
WHDecathlon2-053
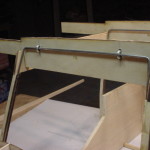
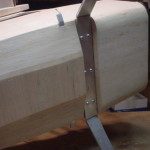
I made up the 1/8"x1/2" alum bar strut mount while waiting on the cabin support epoxy to cure. This strut mount method is different than what is shown on the plans.
WHDecathlon2-054
Forward cabin support epoxied in place. Fill the routed area with epoxy and glue the wire to the support all the way to the top as well.
WHDecathlon2-055
Test fitting the rear cabin support and checking alignment again with F13, F14, and F15s in place.
WHDecathlon2-056
Rear cabin support ready to be epoxied in place.
WHDecathlon2-057
Temporary former F4 top in place to help set the curvature of the F15 rails.
WHDecathlon2-058
1/8" basswood glued across the two F15s. The temporary F4 top will remain in place for a while.
WHDecathlon2-059
1/8"x3/8" balsa stringers added so they can be used to align the fuse top formers.
WHDecathlon2-060
Front and rear top formers in place.
WHDecathlon2-061
Use a stringer in the center slot to align and position the center former.
WHDecathlon2-062
All of the 1/8"x1/2" balsa stringers in place.
WHDecathlon2-063
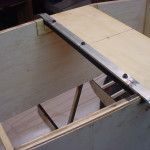
Strut mounting bar bolted in place with (3) 4-40 SHCS and nylon locknuts.
WHDecathlon2-064
Follow the guidelines printed on the fuse sides and glue on the remaining 1/8"x3/8" balsa forward stringers.
WHDecathlon2-065
Left side stringers glued in place. Notice that the bottom ones taper from 3/8" to 3/16" and that the bottom stringer is 3/16".
WHDecathlon2-066
If you wish to build a functioning door it can be cut out at this time. Glue the stringers to the right side of the fuse as you did the left side.
WHDecathlon2-067
Laying out the holes to be drilled for the U-bolts. These bolts are actually part of 1/16" wire rope clamps.
WHDecathlon2-068
U-bolts in place capturing the cabin wires.
WHDecathlon2-069
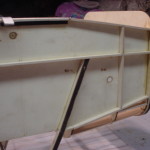
Rear view of the U-bolts and nuts. I will either use a liberal amount of locktite on these nuts or most likely replace them with nylon locknuts.
WHDecathlon2-070
Placing and aligning the bottom front formers.
WHDecathlon2-071
Bottom rear formers glued in place.
WHDecathlon2-072
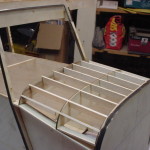
Bottom front 1/8"x1/2" balsa stringers.
WHDecathlon2-073
All bottom stringers glued in place.
WHDecathlon2-074
I glued some 1/4" sq. balsa to former F8 top to help align the vertical fin.
WHDecathlon2-075
Former F8 glued in place. F5 - F7 tops are also in place at this time.
WHDecathlon2-076
3 of the top rear stringers glued in place.
WHDecathlon2-077
Another view of the top rear stringers.
WHDecathlon2-078
The outer 2 top rear stringers are a little tricky in this area. Wet the balsa to prevent it from cracking as you curve it in place.
WHDecathlon2-079
All the stringers set and ready to start sheeting. I set the tail feathers in place just to check it out.
WHDecathlon2-080
Left side sheeting started aligning it with the uppermost stringer.
WHDecathlon2-081
Forward top sheeting glued to the side sheeting prior to wetting/fitting.
WHDecathlon2-082
I made a copy of the cabin window area so I could make up sheeting for this area.
WHDecathlon2-083
I'll start with this and cut the windows out later.
WHDecathlon2-084
Glued in place and windows marked out.
WHDecathlon2-085
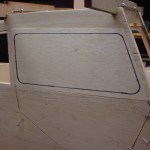
Left side window cutouts. I decided to run this sheeting to the top of F15 instead of trying to fit it to the shape of the wing. The reasoning will be clearer once the wing center section is built.
WHDecathlon2-086
Right front top sheeting completed.
WHDecathlon2-087
Right side cabin area sheeting applied.
WHDecathlon2-088
1/4"x3/8" basswood cross member added at F4 above the windows. When the epoxy cures I will remove the lower cross brace.
WHDecathlon2-089
Bottom sheeting soaked before fitting/gluing.
WHDecathlon2-090
Previous piece glued in place. Some of the Decathlons curves are challenging for 1/8" balsa to navigate.
WHDecathlon-091
Cutting a slot in the bottom sheeting to fit around the strut mount bar.
WHDecathlon2-092
Part of the bottom sheeting in place.
WHDecathlon2-093
Sheeting sanded to an angle to get a good glue bond with the bottom sheeting.
WHDecathlon2-094
Rear corner sheeting is tapered to transition into the flat bottom.
WHDecathlon2-095
Bottom front sheeting shown completed.
WHDecathlon2-096
Continuing on with the bottom rear sheeting.
WHDecathlon2-097
I used crossgrain sheeting to finish off the bottom rear.
WHDecathlon2-098
All the sheeting sanded to the proper angles.
WHDecathlon2-099
The rear of the sheeting where it transitions to flat. I will have to add small tapered pieces on the bottom stringers to give the covering somewhere to adhere to.
WHDecathlon2-100
Rear side stringers added. Saving these for last allowed me to use up any pieces that were cut from other stringers since they can be spliced anywhere.
WHDecathlon2-101
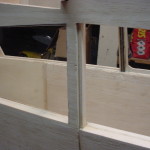
Hard to see in this photo but I have doubled the thickness of the sheeting around the windows to stiffen this area up a little, I've also added a 1/8"x1/4" balsa stick to the bottom of the rear window to give something for the "glass" to mount against.
WHDecathlon2-102
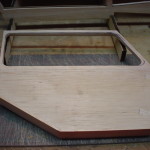
I cut about 1/16" off of all sides of the cabin door except the top. Later i will add sheeting on the sides to get a good fit to the fuse. It will be much easier to sand the added sheeting than all of the materials that make up the door.
WHDecathlon2-103
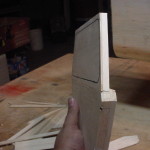
Building up the door to be the same thickness as the fuse side.
WHDecathlon2-104
Medium Robart hinge points will be used for the door hinges.
WHDecathlon2-105
I didnt add blocking for the door hinges figuring that they would pass through the 1/8" plywood side and be secure enough. Turns out that the hinges have to be angled such that they just barely make it to the ply. I will remedy that situation by retrofitting some hinge blocking.
WHDecathlon2-106
First block fit in place.
WHDecathlon2-107
Blocking sanded flush and the hinge location laid out again.
WHDecathlon2-108
The door is ready to drill for the hinges...again.
WHDecathlon2-109
Oops...forgot that was there.
WHDecathlon2-110
Blocking cut to fit around the cabin support.
WHDecathlon2-111
Much better now.
WHDecathlon2-112
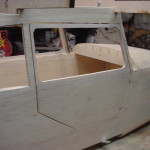
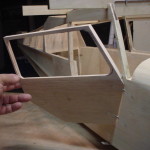
Looks like a working door to me.
WHDecathlon2-113
Getting the window sheeting ready.
WHDecathlon2-114
The top half of the door/window is framed up out of 1/8"x3/8" balsa sticks.
WHDecathlon2-115
The upper half is a little fragile until you can take it off and reinforce all of the glue joints.
WHDecathlon2-116
Window cutout completed and doubled on the inside like the rest.
WHDecathlon2-117
Finished door/window.
WHDecathlon2-118
Works good for now but I will do a final sanding/fitting later.
WHDecathlon2-119
Rollin out the wing plan!
WHDecathlon2-120
The 4 main wing spars have to be spliced to get all the way out to the tip. Use a kerf joint and make sure you get a good fit.
WHDecathlon2-121
Spar splice glued together along a straightedge.
WHDecathlon2-122
I used 48" long basswood for the spars which meant that i only had to add about 1 1/2".
WHDecathlon2-123
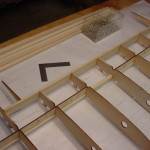
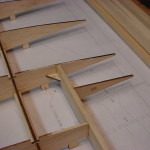
Having the sheer webs laser cut makes building the wing go quickly. I was able to square up the first rib and then glue in webs/ribs all the way down the line without having to square up each piece.
WHDecathlon2-124
From rolling out the plan to here in about 15 minutes.
WHDecathlon2-125
1/4" balsa trailing edge added at the aileron opening.
WHDecathlon2-126
W3A and some laser cut gussets added.
WHDecathlon2-127
Between the spars is filled solid with basswood at the strut mount locations.
WHDecathlon2-128
Tip rib W6 is larger than all the rest so that it doesn't need to be cap stripped. Here I am making a W6A to catch the leading edge sheeting. Future kits will have these parts laser cut.
WHDecathlon2-129
W6A glued in place as well as the top spars.
WHDecathlon2-130
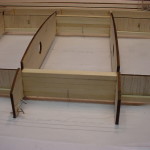
Time to work on the wing joiner boxes.
WHDecathlon2-131
Use the 3/8" plywood joiners to make sure you have a good fit inside the box. Be sure to pull them out before the epoxy cures just in case some epoxy oozed into the box.
WHDecathlon2-132
I used some epoxy/milled fiberglass to make a fillet between the plywood joiner box and the ribs it fits up against.
WHDecathlon2-133
Front joiner box is constructed just like the rear. Be sure to use the correct plywood joiner (F13/F14) as they are different sizes.
WHDecathlon2-134
Splicing the 1/4" balsa sub leading edge.
WHDecathlon2-135
Sub leading edge glued in place flush with the tops of the ribs. you can also see the balsa infill on top of the spar that will be sanded to match the ribs.
WHDecathlon2-136
Sand the sub leading edge to follow the contour of the ribs.
WHDecathlon2-137
The tops of the joiner boxes have to be fiberglassed prior to sheeting the wing center section. I chose to tack the cloth in place with thin CA and then brush thinned epoxy over it.
WHDecathlon2-138
Here is another personal preference departure from the original design. I like to have some sheeting at the trailing edge to stiffen it up and to give more surface gluing area for the tapered trailing edge.
WHDecathlon2-139
Splicing the top leading edge sheeting.
WHDecathlon2-140
Top leading edge sheeting glued in place.
WHDecathlon2-141
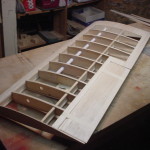
Center sheeting almost completed. At this point it is safe to remove the wing from the building board.
WHDecathlon2-142
Now that's what i call a cap strip! 1/8"x3/8"x16" long balsa. All of the rib tops can be cap stripped at this time.
WHDecathlon2-143
1/2" balsa hinge blocks added.
WHDecathlon2-144
Bottom trailing edge sheeting applied and sanded square with the ribs. This is a good shot showing the extra gluing area for the tapered trailing edge that i mentioned earlier.
WHDecathlon2-145
The balsa trailing edge glued in place.
WHDecathlon2-146
3/32" plywood rib doublers and servo hatch rails epoxied in place. This servo mounting method is different than what is shown on the original drawings.
WHDecathlon2-147
3/4" paper tube for routing servo wiring. I wrapped the paper tightly around a 1/2" dowel and slid the dowel into the wing. When i released the paper it uncoiled tight to the 3/4" hole in the ribs. I then wrapped a piece of packing tape around the tube between each rib and spot glued it in place with some thin CA.
At this point I have 34 hours of total build time in this project and should have no problem having it framed up for display at a local RC flea market coming up in 4 weeks. After building hand cut and/or die crunched kits for the better part of 32 years, I can’t say enough about the speed and ease with which a laser cut kit goes together. Combined with CAD drawn parts and plans, the laser cut parts fit together perfectly…the first time…with no sanding required. The charring on the wood edges can mostly be removed with a few light strokes of 120 grit sandpaper (the thicker plywoods require a bit more elbow grease) if you so choose but it has no effect on the ability of glues to soak into the wood for a good bond.
The left wing construction continues below and then picks up with the center section construction. I did not take any pictures of the right wing panel construction as it is simply a mirror image of the left. the important thing is that you remember to build one right and one left panel.
WHDecathlon2-148
Bottom sheeting and cap strips started.
WHDecathlon2-149
Attach the servo hatch cover prior to fitting the cap strips.
WHDecathlon2-150
Cap strips fitted and glued around the servo hatch cover.
WHDecathlon2-151
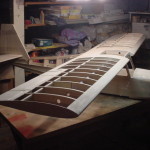
The trailing edge can be sanded to shape after the cap stripping is completed.
WHDecathlon2-152
Sand the leading edge sheeting flush to the sub-leading edge.
WHDecathlon2-153
Leading edge glued in place.
WHDecathlon2-154
Leading edge is rough sanded to shape.
WHDecathlon2-155
Gathering up the parts to build the aileron.
WHDecathlon2-156
Aileron ribs glued to the bottom sheeting. Notice the cutout for the plywood control horn that will be added later.
WHDecathlon2-157
Blocking added for the aileron hinges.
WHDecathlon2-158
Top sheeting glued on and everything sanded flush to the front of the ribs,
WHDecathlon2-159
Plywood control horn glued in place.
WHDecathlon2-160
1/2" balsa leading edge glued in place.
WHDecathlon2-161
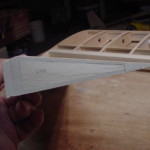
3/8"x1" trailing edge before shaping.
WHDecathlon2-162
Trailing edge after shaping.
WHDecathlon2-163
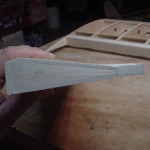
End cap glued on each end of the aileron. This is a personal preference item that is not shown on the plans.
WHDecathlon2-164
Aileron taped in place for now.
WHDecathlon2-165
Some basswood blocking for the jury strut mount.
WHDecathlon2-166
Jury strut mount blocking is 3/4" thick total.
WHDecathlon2-167
Taping up the tail feathers to get ready for display.
WHDecathlon2-168
Prepping to build the wing center section.
WHDecathlon2-169
Plug in both wing panels to ensure proper alignment of the plywood joiners.
WHDecathlon2-170
When satisfied with the alignment, glue the center section ribs to the plywood joiners.
WHDecathlon2-171
Sub-leading edge glued in place. A little wax paper will prevent gluing the outer panel tight.
WHDecathlon2-172
All ribs glued in place with a temporary brace to keep the trailing edge aligned.
WHDecathlon2-173
Center section is now off the fuselage and clamped tight to one wing panel in preparation for sheeting.
WHDecathlon2-174
Bottom trailing edge sheeting glued in place.
WHDecathlon2-175
Bottom sheeting cutout for access to the U-bolt nuts.
WHDecathlon2-176
Balsa filler on top of the plywood joiner sanded to match the rib contour.
WHDecathlon2-177
Working forward with the top sheeting.
WHDecathlon2-178
More balsa filler on the front joiner.
WHDecathlon2-179
Top sheeting finished and sanded flush with the ribs.
WHDecathlon2-180
Bottom sheeting installed and leading edge glued on and rough shaped.
WHDecathlon2-181
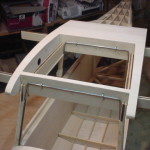
Finished center section bolted to the fuselage.
WHDecathlon2-182
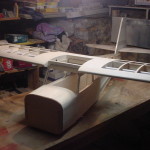
Everything together for the first time.
WHDecathlon2-183
Only the wingtips need installed yet. For size comparison, the workbench is a 32"x80" door slab.
WHDecathlon2-184
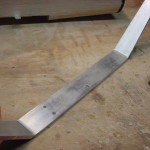
Aluminum gear drilled for mounting bolts.
WHDecathlon2-185
Gear bolted in place.
WHDecathlon2-186
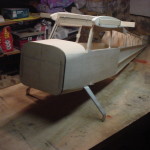
Completed fuselage ready to go to sale.
The Decathlon took 63 hours to frame to this point. There is still some work to do before covering but that will be up to its new owner as they fit the motor and electronics.

Leave a Reply
Please note: Comment moderation is currently enabled so there will be a delay between when you post your comment and when it shows up. Patience is a virtue; there is no need to re-submit your comment.